This post may contain affiliate links. Affiliate links use cookies to track clicks and qualifying purchases for earnings. Please read my Disclosure Policy, Terms of Service, and Privacy policy for specific details.
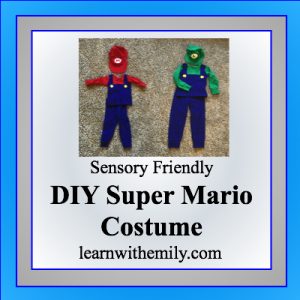
Super Mario characters are a favorite at my house. I have been making sensory friendly Super Mario Brother costumes for a few years. The older well-loved outfits are used regularly and worn out. As I made 3 more outfits, I created this tutorial on how to adapt the Alex and Anna Winter PJ pattern for a sensory friendly DIY Super Mario Costume.
Supplies for the DIY Super Mario Costume

- Alex and Anna Winter PJ pattern from Peek-A-Boo Pattern Shop. CLICK HERE to go to the pattern shop. These are PDF patters, so you will need to print and assemble the pattern.
- Cotton lycra knit fabric* in the colors you need for your character (green/blue, red/blue, etc.). You will also need elastic for the pants. See pattern for yardage and other material requirements.
- For the buttons, you will either need 2 large buttons, felt scrap, or other non-fraying fabric scrap. I also used the top of a baby bottle lid to trace by button shapes.
- Ruler
- Fabric Scissors
- Washable Crayola Markers (if you mark your fabric with these, it will wash out)
- Tracing Paper
- Sewing Machine and thread
- Serger machine (optional)


*I buy my cotton lycra fabric from Purple Seamstress. These are high quality and are shipped quickly. I avoid knits from JoAnns due to pilling and limited stretch.
Pattern Modification Steps
Step 1: Trace or cut out the pattern in the size you need for the child.
Assuming you have already printed out and assembled the Alex and Anna Winter Pajama pattern, trace or cut out the size you need for your child. For the modifications, you will only be adjusting the bodice piece.

*For the purposes of this tutorial, I drew a bodice shape. I did not use the real pattern piece due to copyright laws. Please do not try to use my drawing as your pattern as it is not to scale.
Step 2: On the bodice piece, draw a perpendicular line from the center front to the under arm point.

Step 3: On the bodice piece, draw a perpendicular line from the line you already drew to the point where the shoulder meets the neck line.

Step 4: Cut the pattern piece apart. You should now have 3 bodice pieces.

Step 5: Retrace your pattern pieces and add a seam allowance to the new edges from the lines you drew. I added a 1/2 inch seam allowance.


Step 6: Cut out your pieces. Also cut out the pieces you need for the rest of the outfit based on the original pattern pieces and instructions (e.g., sleeves, neckband, sleeve and leg cuffs, pants)

Assembly Instructions for the DIY Super Mario Costume
Step 1: Pin the right side of the faux overall strap to the right side of the faux undershirt.

Step 2: Pin the other side of the faux overall strap in the same manner.

Step 3: Sew your seams and press towards the faux overall bands.


Step 4: Pin the top piece (the part you just sewed) to the bottom half of the faux overall, right sides together. Then sew your seam. and press down towards the bottom half of the shirt.


Step 5: Repeat the process with the back part of the shirt.
Step 6: For the buttons on the shirt front, you can either sew on real buttons or sew on circles to create faux buttons. For mine, I traced around the top part of a baby bottle lid on yellow cotton lycra. On past versions, I have also used felt or fleece. If you are newer to sewing, I would recommend using felt or real buttons. Pin your circles below the faux straps and sew in place. I zig-zagged around mine.


Step 7: You should now have a front and back pieced together to form the Mario Brother faux overalls. Continue sewing together following the Alex and Anna Pajama pattern directions.

Finished Samples
I have red power star mario, Regular Mario and Luigi in sizes 12 mo, 5T, and 6.


*The hats are made out of matching cotton lycra knit fabric and are my own pattern.
Conclusion on the Sensory Friendly DIY Super Mario Costume
These costumes are not only comfortable for kids to use they are also faster to sew than overalls. My kids wear them all the time, but they can also double as pajamas so you will get a lot use out of these fast and comfortable Sensory Friendly DIY Super Mario Costumes.
Amazon Mario Hat and Costume Links: