
This post may contain affiliate links. Affiliate links use cookies to track clicks and qualifying purchases for earnings. Please read my Disclosure Policy, Terms of Service, and Privacy policy for specific details.
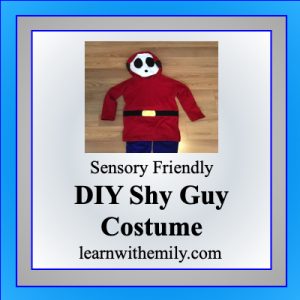
Although Halloween is long gone, dress up and costumes are a year-round thing at my house. One of my children requested a Shy Guy costume for Christmas. If you don’t recognize Shy Guy, he appears in some of the Mario games, like Paper Mario Color Splash. This article describes the process and resources I used to make a children’s sensory sensitive DIY Shy Guy costume.

Materials
Patterns
I used two patterns from Peek-a-Boo pattern shop. The Grand Slam Tee for the top and the Alex and Anna Winter PJs for the pants. Both of these patterns are fast and easy to sew and two of my most used patterns. The Alex and Anna Winter PJs are my go-to costume pattern.
Click here to buy the Grand Slam Tee.
Click here to buy the Alex and Anna Winter PJs.
Fabric
I used blue and red cotton lycra from Purple Seamstress Fabrics for the shirt and pants. For the mask, I used white fleece and black sportswear mesh. You will also need small scraps of brown, yellow, and black stretchy fabric for the belt and strap accents. Cotton lycra, fleece, or french terry would all work.
Notions
- Thread to match your fabric
- Elastic for the waistband
Procedure
Pants
The pants are the easiest part of this costume. Cut out the Alex and Anna Winter Pants in blue cotton lycra and sew according to pattern directions.
Mask
I wanted the mask to attach to the shirt, be soft and washable, and the eye pieces see-through. So, I went with fleece for the face mask and sports mesh for the eyes and mouth. JoAnns sells the sports mesh, but I actually cut some out of my husband’s shorts. This was with his permission, of course.


I held up several circular objects to my child’s face until I found the right size for his mask. I traced a circle on my fleece from a salad plate. I also drew a tab at the top of the circle to attach the mask to the hood. The tab is about 2.5-3″ by 1/2″. Next I drew an oval for each eye and mouth. The drawings above are not to scale. They are illustrations to demonstrate my process.
- Cut out two mask shapes from white fleece, but be sure to leave the tab on top.
- Then cut out the ovals for the eyes and mouth from each fleece circle.
- Sandwich your black mesh between the two face pieces and pin in place.
- Carefully sew around the eye ovals and mouth oval using a zig zag stitch.
- Zig-zag around the outer edge of the mask to secure the two mask pieces together.

Although it is hard to tell from the picture, it is easy to see through the black mesh when the mask is over the face.
Hood and Hood Strap

Use the Grand Slam pattern and cut out one hood for your corresponding size in red cotton lycra. Sew the two hood pieces together as instructed in the pattern directions. Cut a 2″ strap to go around the hood in brown. I centered my brown strip and just zigzagged each side down. Next, fold over the front edge of the hood and pin in place. Center the mask piece at the top and slip it inside the folded edge. Sew the folded outer edge of the hood in place per pattern directions.
Your mask should now be secured to your hood.
Shirt
Cut out your sleeve pieces according to pattern directions. On the shirt piece, I extended the bottom of the pattern a few inches to reflect a tunic length. Sew the shirt, including attaching the hood to the neckline, according to pattern instructions.
Belt

The belt is sewn on last, after the shirt is fully assembled and hemmed. I decided to have a faux attached belt for the comfort of my sensory sensitive child. Find the waistline by holding the shirt up to your child. Mark the waistline evenly from the bottom edge around the shirt. I cut a 1.5″ strap of black french terry and sewed it around the waistline. I made the buckle about 3″ wide and slightly larger than the the belt height. The buckle was cut from a yellow fleece scrap. Zigzag around the edges to secure in place.
Conclusion on DIY Shy Guy Costume
Now this comfortable, sensory-friendly DIY Shy Guy costume is ready to wear! I hope you found my explanations helpful.